Wednesday Crafternoons
It’s Wednesday. Let’s Get Cozy!
12.16.20

It's time to hibernate!
Along with bears, humans have their own version of hibernating.
Let's face it. Winter brings it out of everyone.
Shorter days, snowy sleighs, and icky greys.
It's hard to not want to snuggle up with a blanket and call it a day even it's only 11 am.
It doesn't even have to be sleeping.
Watching TV, playing videogames, drawing, reading a book, drinking hot chocolate 😋 ☕
Any activity that lets you park yourself in one spot for several hours.
Winter takes out the Move 'n Groove in us and drags in the Laze 'n Graze aka Baby Mode.
Lounging around and eating all day... Ahh, to be a baby.
We grow up too fast.
Seriously.
Speaking of growing though, it's also the season to donate old clothes.
Do you have an old T-shirt that you've outgrown but can't bear to get rid of?
Turn it into something else!
This month's craft is the no-sew pillow.
Grab some chalk (or a Sharpie), a ruler, scissors, and any type of soft stuffing.
Engage Baby Mode because this pillow will take minimum effort. 😎
Ready? Let's get started.
Step 1
Draw A Border
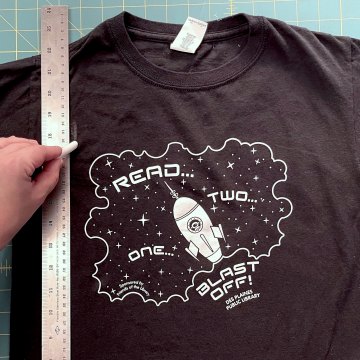
Smooth out the shirt and lay down flat.
Use chalk to draw an outline around the design.
It could be a square, a rectangle, or even a circle if you're feeling brave.
Step 2
Double Outline
Add a second one about 2 inches out.
The space between the two will be your fringe.
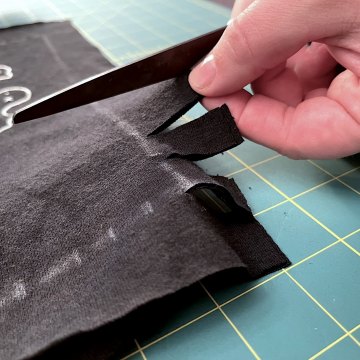
Step 3
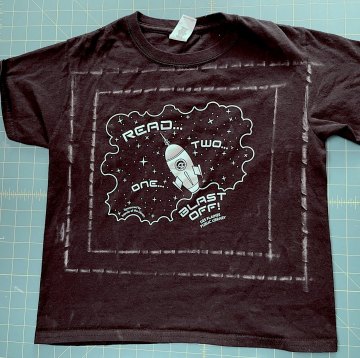
Cut Out The Design
Cut along the outermost line through BOTH the front and back sides of the T-shirt.
You should end up with 2 pieces of fabric.
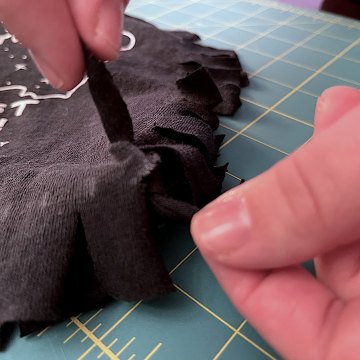
Step 4
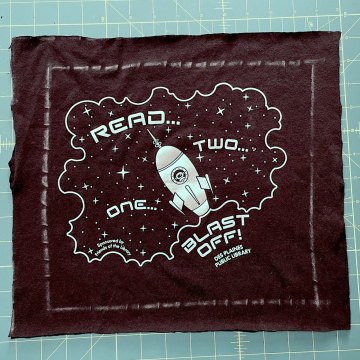
Cut The Fringe
Keep the 2 pieces laid over each other.
Pick a spot and cut straight from the outer line to the inner one. Stop there.
Repeat action half an inch over.
Continue cutting even strips around entire border.
Note: The corner squares will fall off at this step.
Step 5
Tie Fringe Strips Together
Separate pieces of fabric.
Double knot the front and back strips together.
Do this all around the outside but leave an opening big enough for filling.
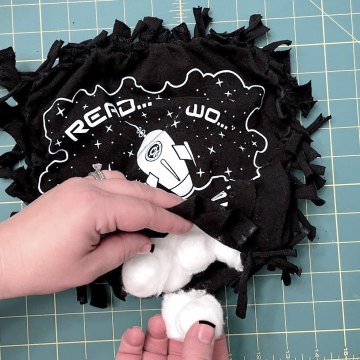
Step 6
Stuff the Pillow
Add some kind of soft filling inside until plump.
We used cotton balls, but old socks, scraps of fabric, or feathers are also options.
Repeat Step 5 to seal the pillow.
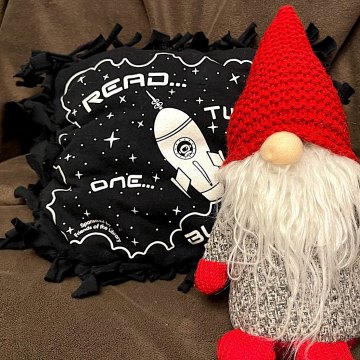
SWEET DREAMS!
Well, what are you waiting for?
Test out your new pillow!
Get yourself cozy and catch some Z's.
Can't turn off the creativity just yet? We totally get that.
Here are more super-cute no-sew fabric crafts!
Perfect for a quiet winter day inside. 😌
No need to thank us.
Just snap a couple of photos, tag them #DPCrafternoons and share with us on Facebook and Instagram.
You know how this works.

Check back in next time, or should we say, year for more craftiness.